There’s a technique that almost every professional producer and mix engineer uses, yet it’s rarely talked about in tutorials or courses. It’s called referencing, and the idea is simple: you compare your in-progress track against a finished, mastered track in a similar style, directly inside your DAW. Think of it as giving feedback to yourself through other people’s music.
This post covers why it works and, more importantly, how to set it up.
Why referencing works
When you spend hours in a session, your ears adapt and you lose objectivity. That 909 open hi-hat that’s way too loud starts sounding normal after listening to your loop for a bit. This is a well-documented phenomenon called auditory adaptation, and research suggests it kicks in after as little as 20 minutes of continuous listening.
Listening to a reference track snaps you out of that “tunnel hearing” instantly.
By A/B comparing your work against a finished, mastered track in a similar style, you’re borrowing someone else’s ears. You’re benchmarking your sound against a known standard, one that’s been mixed, mastered, and vetted by professionals.
How to reference in practice
Referencing does not mean pulling up a track on Spotify or YouTube, listening for a couple of seconds, and then switching back to your DAW to compare from memory.
The trick is to have your reference track inside your DAW session, level-matched and key-mapped so you can flip between them and your own mix in an instant. Your brain simply cannot register subtle differences in frequency balance, width, or low-end weight if there's a gap between what you're comparing. Unless you have decades of experience, surgically trained ears, and a room you know by heart, you need that immediate, seamless A/B flip to actually hear what's going on.
How to set up a mix referencing workflow
Here's an approach I use which you can set up in any DAW in a couple of minutes:
1. Pick your reference tracks
Choose one to three tracks that represent the sound you're going for. These should be commercially released, professionally mastered tracks in the same genre or style you're working in. We'd recommend buying the tracks to support the artists, and also to get the best source material for referencing (i.e., no YouTube rips!).
If you're making a deep, minimal techno track, don't grab a catchy house track for reference. Match the energy, the tempo range, and the overall sonic character. The closer the stylistic match, the more useful the comparison.
2. Drag them into your session
Import those reference tracks directly into your DAW. Put the reference tracks on separate audio channels. Route them to External Out so they don't get affected by any processing on your master bus.
3. Key-map for instant switching
Assign keyboard shortcuts or key-map your reference tracks so you can solo them instantly. You want to be able to flip between your master bus and any reference track in a fraction of a second. The quicker the switch, the more revealing the comparison.
In most DAWs you can assign solo/mute shortcuts to specific tracks. Set this up once and it'll save you hundreds of micro-decisions over time. My personal favorite is to use the key "§" for soloing the reference track. Remember to also turn off the channel so it's quiet when not soloed.
 Reference channel in Ableton Live set-up
4. Level-match
Pull the volume of your reference tracks down by about -12 to -6 dB so they sit closer to the level of your unmastered mix. The goal is a fair, volume-matched comparison. Your ears perceive louder as better, so removing that bias is essential. Just adjust the fader on the reference track channel until it sounds roughly similar in volume to your project. If you make electronic music, one trick is to compare the kick loudness and match that.
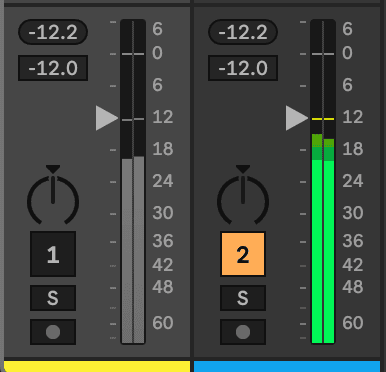 Level-matching reference track and your track
5. Listen critically
Once your levels are matched, start flipping back and forth between your mix and each reference. Listen actively to the differences between the reference and your track and try to identify areas where there is some noticeable difference. Personally, my ears tend to focus on these areas when I reference:
The mix:
- Low end. Is the sub as tight and controlled as the reference? Or is it muddy, bloated, or thin by comparison?
- Top end and clarity. Do the hi-hats and upper harmonics have the same sparkle and air? Or does my mix sound dull, or maybe harsh?
- Balance. How does the vocal or lead element sit relative to everything else? Is my vocal as bright and clear as the reference? Often it's not.
- Width. Does my mix feel as wide and spacious? Or is everything collapsed to the center?
- Loudness and dynamics. Even with levels matched, does my track feel as alive and dynamic? Or is it flat and lifeless by comparison? Are synths "popping out" of the speakers (in a good way)?
The creative choices:
- Effects and depth. What effects are being used? How is reverb used to create space in the reference mix? What element sits where in the mix?
- Sound selection. Referencing is not only about the mixdown. It's important also for understanding a genre. What sounds are actually being used? What kind of drums, synths, and textures? The goal here is to gain understanding of the "sonic palette" of the vibe that I'm referencing.
6. Use a spectrum analyzer to see what you're hearing
Your ears should always be the final judge, but visual feedback can confirm what you're hearing, or reveal things you're missing entirely.
Voxengo SPAN is a great free spectrum analyzer plugin that works in virtually every DAW (we are not affiliated with Voxengo, I just like their free stuff). Drop it on your master bus and the reference track channel and compare the curves. As an example, you might notice your track has some synths that poke out through the mix a bit too much (see right-hand side in the image below).
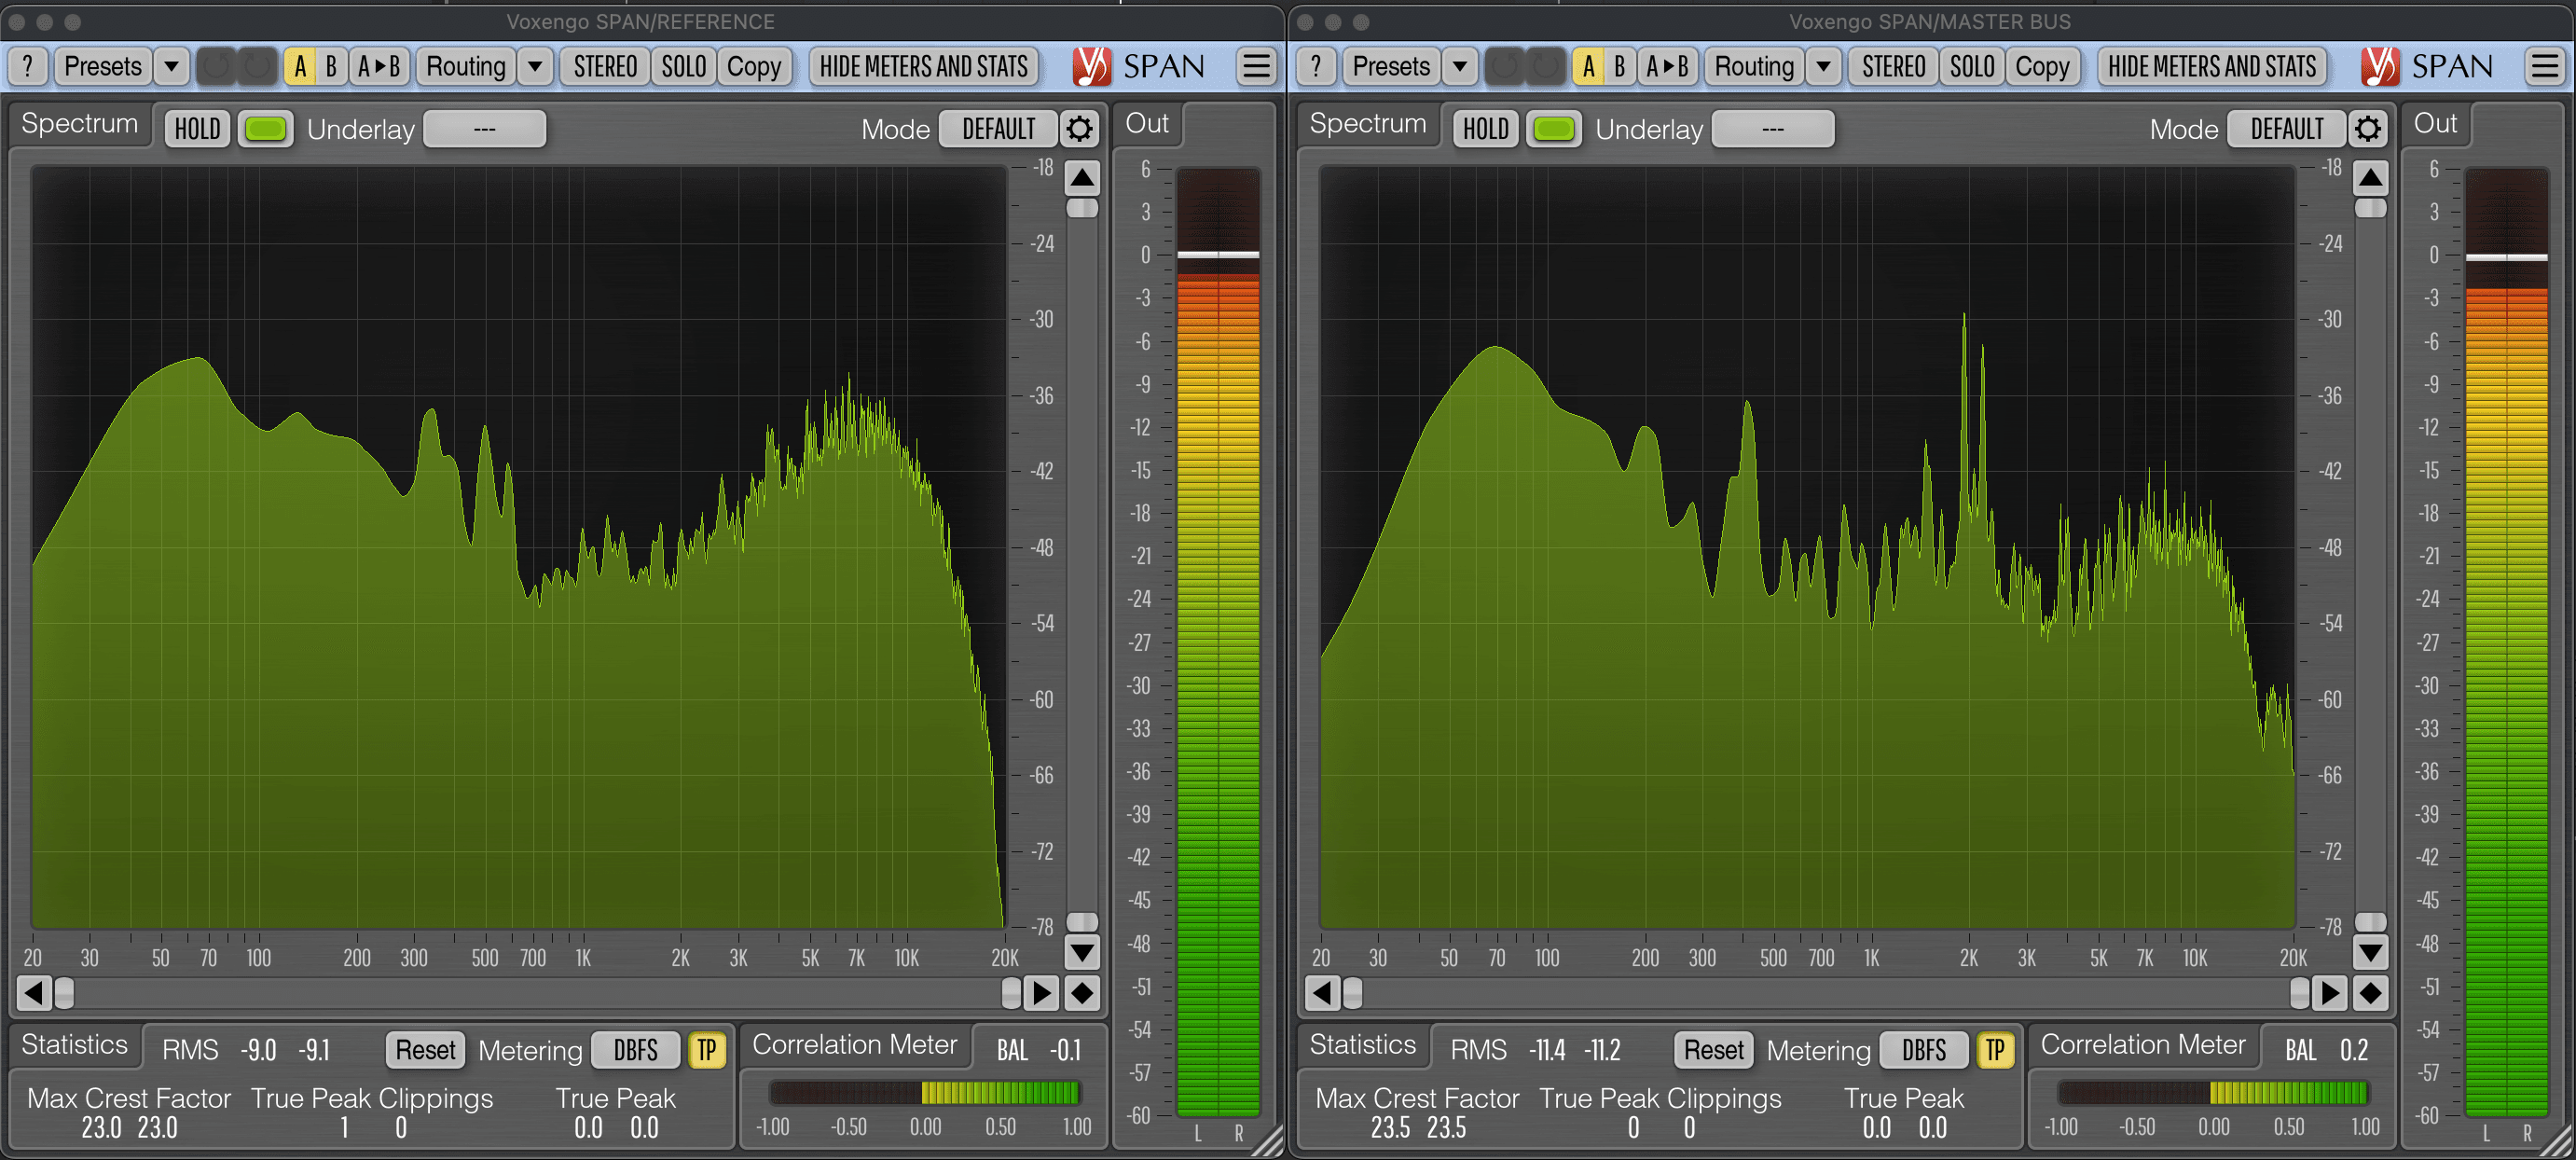 SPAN: Visual feedback of reference track vs. your track
7. Reference the arrangement, not just the sound
One thing worth mentioning: you can also reference structure.
Zoom out in your DAW and look at the waveforms of your reference tracks. The visual shape of a mastered track tells you a lot about the arrangement. You can see where the intro sits, where the first melodic section builds, where the main groove kicks in, where the breakdown strips things back, and where the drop hits.
Mark up those sections directly in your session. For example: intro, build, groove, breakdown, drop, cooldown, and outro. Then compare that structure to your own track. Are your sections a similar length? Does your energy arc follow a similar flow? Is your drop landing at a moment that makes sense for the genre? Most referencing articles only talk about sonic comparison, but this structural side is just as valuable for understanding why some tracks feel like they have momentum and others feel like they stall out or are too “loopy”.
 Example of three different arrangements
Start referencing today!
Next time you open a session, take five minutes to drag in a reference track. Level-match it. Flip back and forth. Listen with intention. Some producers build referencing into their pre-session routine, right alongside sound selection and template setup.
A simple change to your workflow, and probably the most impactful one in a while. 😊
Best,
Philip
March 13, 2026
Tracklounge is built for producers who take their craft seriously. Get structured feedback on your tracks from people who actually listen. Try it out →